Great visuals can grab attention, but poor audio will make viewers click away faster than anything else. That’s why even beginner video creators need to understand the basics of audio editing. You don’t need a studio or advanced plugins to make your sound clear and professional, just a few core techniques. This guide breaks down the fundamentals so you can clean up your audio, balance levels, and give your videos a polished feel without getting overwhelmed by technical jargon.
TL;DR
- Start simple: Learn the difference between raw audio and polished sound.
- Clean up background noise with basic noise reduction tools.
- Balance your levels so dialogue, music, and effects sit together naturally.
- Use EQ lightly to remove muddiness and bring clarity.
- Apply compression to even out loud and soft parts of speech.
- Export at the right loudness so your video sounds good on any device.
- Focus on clarity first, fancy effects can come later.
This is a basic guide for beginners starting out with audio editing. If you want a more in-depth guide, see my ultimate guide to audio editing for video.
What Audio Editing Really Means
When people hear “audio editing”, they often think of complicated software or music production. In reality, editing audio for video is more about making sure your sound doesn’t distract from the story. It’s not about turning you into a sound engineer, but about learning a few tools that help dialogue sound clear, music feel balanced, and background noise stay under control.
Think of it as the difference between raw footage and a finished cut: raw sound may be usable, but it often has rough edges. Audio editing smooths those edges, creating a professional and enjoyable experience for your audience.
At its core, video audio editing involves:
- Cleaning: Removing hiss, hums, or background noise.
- Balancing: Making sure dialogue, music, and effects don’t fight each other.
- Shaping: Using EQ and compression to bring clarity and consistency.
- Delivering: Exporting sound at the right levels for web or social media.
Even if you only master the basics, these steps can instantly improve how your videos are received.
Sync First: Matching Audio to Video
Before you even start cleaning or adjusting sound, synchronization comes first. If your audio and video are even slightly out of sync, viewers will notice immediately, and they’ll likely click away.
There are two main scenarios:
- In-Camera Audio
- If you record audio straight into your camera, syncing is automatic. But it’s worth checking playback to make sure your device didn’t drift or clip.
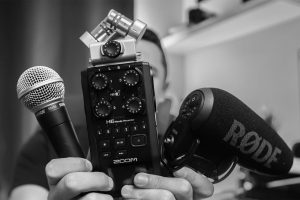
- External Audio Recorder or Microphone
- If you use a separate recorder, you’ll need to line up the external audio with the camera’s scratch (built-in) audio.
- The simplest method: use a clap or slate at the beginning of the recording. The visual (hands closing or slate closing) and the sharp audio spike give you an easy sync point.
- Most editing software (Premiere Pro, Final Cut, DaVinci Resolve) have an auto-sync by waveform feature that saves time.
Pro tip: Always double-check sync at multiple points in your timeline. Longer recordings can drift slightly, especially if the recorder and camera aren’t locked to the same clock.
Getting sync right at the start avoids headaches later and ensures every edit you make -whether it’s volume balancing, EQ, or effects- lines up perfectly with the action on screen.
If you don’t know which type of microphone you should use, read this guide on how to choose the right microphone for video.
Cleaning Up Your Audio: Noise Reduction Basics
Even with careful recording, background noise often sneaks in: fans, traffic, room echo, or electronic hums. Cleaning this up is one of the fastest ways to make your audio sound more professional.
Common Types of Noise and Distractions
- Constant hum or hiss: often from air conditioners, electrical interference, or camera preamps.
- Room echo (reverb): happens in untreated spaces with hard surfaces.
- Random background sounds: footsteps, keyboard clicks, distant chatter.
Tools You Can Use
- Noise Reduction Filters: Most editing software (Premiere Pro, Final Cut, Resolve) have simple noise reduction or denoiser effects.
- EQ (Equalizer): Cutting low rumbles (below ~80Hz) and taming harsh highs can remove distractions.
- Noise Gates: Automatically mute sections of silence so faint background noise doesn’t bleed through.
Best Practices
- Apply noise reduction lightly. Overdoing it can create robotic or “underwater” audio.
- Focus first on removing distractions that compete with dialogue.
- Always listen through headphones, not just speakers, to catch subtle issues.
Pro tip: If you know your shooting environment has lots of background noise, record a few seconds of “room tone” (silence in the space). This can help noise reduction tools work more effectively later.
Balancing Levels: Making Everything Even
Good audio isn’t just about removing noise. It’s about making sure your audience can clearly hear what matters most. In video, that usually means dialogue sits on top, with music and effects supporting it.
Why Balancing Matters
- Unbalanced audio is distracting: if music overpowers speech, viewers will struggle to follow your story.
- Consistency keeps attention: sudden jumps in volume force people to adjust their speakers or headphones.
- Professional polish: balanced audio feels smooth and intentional, not chaotic.
Practical Balancing Tips
- Dialogue first: Set your main speaking track at a comfortable, clear level.
- Music second: Lower background music so it supports the mood without competing. Duck it (reduce volume) during dialogue.
- Effects last: Sound effects should enhance the story but not shock the viewer, unless intended.
Tools That Help
- Volume sliders/faders: your main adjustment tool in any editing program.
- Audio meters: keep dialogue peaking around –6dB to –3dB for clarity.
- Keyframes: adjust levels over time so music fades in and out naturally.
- Auto-ducking (in software like Premiere or Resolve): automatically lowers music when dialogue is present.
Quick check: Play your video at both low and high speaker volumes. If the dialogue is always clear without the music being overwhelming, your balance is on point.
EQ and Compression Made Simple
Once your levels are balanced, EQ and compression take your audio from “good enough” to polished. Think of them as fine-tuning tools that shape the clarity and consistency of your sound.
EQ (Equalization): Shaping the Tone
EQ lets you boost or cut specific frequencies to make audio clearer.
- Cut the mud: Reduce low frequencies (below ~80Hz) to remove rumble.
- Tame harshness: Pull back slightly in the 2–4kHz range if dialogue feels sharp.
- Add clarity: A gentle boost around 4–6kHz can make voices more crisp.
- Brighten or soften: Subtle high-frequency adjustments (8kHz and above) can make dialogue sparkle or sound smoother.
Rule of thumb: Make small changes. Big EQ shifts can sound unnatural.
Compression: Evening Out Dynamics
Compression controls the difference between loud and quiet parts. It keeps sudden peaks from being jarring and ensures soft speech doesn’t disappear.
- Threshold: The level where compression kicks in (e.g., –10dB).
- Ratio: How strongly it reduces peaks (e.g., 3:1 keeps loud sounds in check).
- Attack & Release: How quickly it responds; slower for natural voices, faster for sharp sounds.
- Make-up Gain: Boosts the overall track back up after compressing.
Tip: For dialogue, light compression (2:1 or 3:1 ratio) often makes voices sound fuller and more consistent.
Simple Workflow
- Balance your levels first.
- Apply EQ to clean and clarify dialogue.
- Add compression to smooth everything out.
Quick check: Listen with headphones and speakers. If the voice is always clear and not jumping in volume, you’ve nailed it.
Tools of the Trade: Beginner Software Options
You don’t need expensive gear to start editing audio. Many beginner-friendly programs make it easy to clean up sound and learn the basics without overwhelming you. Here are some options to consider:
Free Options
- Audacity (Windows, macOS, Linux): A long-standing free editor. Great for cutting, noise reduction, and simple EQ, though the interface looks dated.
- DaVinci Resolve (Fairlight tab) (Windows, macOS): Comes with built-in audio editing tools. If you’re already editing video in Resolve, it’s a natural choice.
Affordable Upgrades
- Adobe Premiere Pro + Essential Sound Panel: Simplifies audio cleanup with presets for dialogue, music, and effects. Ideal if you’re already in Adobe’s ecosystem.
- Adobe Audition: More advanced than Premiere’s tools, but still approachable. Offers excellent noise reduction and repair features.
All-in-One Video Editors (with Audio Tools)
- Final Cut Pro (macOS): Streamlined workflow with solid audio adjustments built in.
- Filmora (Windows, macOS): Beginner-focused, with simple tools for audio leveling and background noise removal.
Tip: Start with what you already have. If your video editor includes basic audio tools, use those first. You can always step up to dedicated audio software as your skills grow.
Common Mistakes Beginners Make
When you’re new to audio editing, it’s easy to make choices that actually make your sound worse instead of better. Here are the most common pitfalls to avoid:
1. Overusing Noise Reduction
Too much noise reduction makes voices sound robotic or hollow. Use it sparingly and combine it with EQ for more natural results.
2. Ignoring Peaks and Clipping
If your audio level spikes into the red, the distortion is permanent. Always keep an eye on your meters while editing.
3. Forgetting to Balance Dialogue and Music
Background music should support, not drown out, the voice. A common beginner mistake is leaving music too loud.
4. Applying Effects Randomly
EQ, compression, and reverb can make audio sound great, but only if used intentionally. Avoid piling on effects without a purpose.
5. Not Checking on Different Devices
What sounds fine on studio headphones may be boomy or thin on a phone speaker. Always do a quick check across multiple devices.
6. Editing Only with Visuals
Don’t just watch the waveform. Listen carefully to every cut and transition, because audio glitches can be subtle but distracting.
By being aware of these mistakes early, you’ll save yourself hours of frustration and create cleaner, more professional sound right from the start.
If you want to keep learning about audio, you should also read this guide: 10 Tips to Get Better Sound for Your Video Projects.
Last Words
Good audio doesn’t require a huge budget or years of experience. With an understanding of the basics of audio editing for video, and building the right habits over time -syncing first, balancing levels, reducing noise carefully, and checking your mix across devices- you can instantly elevate your videos and keep improving them over time. Start simple, avoid the most common mistakes, and build your skills step by step. Over time, audio editing will feel as natural as cutting your video timeline.
Want to keep learning? Follow me on your favorite social media (handle everywhere: @MediabyHamed / search for Hamed Media) or subscribe to my newsletter for more practical tips and guides like this.
FAQ
Do I need special headphones for audio editing?
Good headphones help, but you don’t need expensive studio gear to start. Any closed-back headphones that reveal detail without boosting bass are fine.
Should I edit audio before or after video?
For beginners, it’s easiest to edit alongside your video timeline. As you gain experience, you can export and refine audio separately.
What’s the fastest way to improve audio quality?
Record clean audio in the first place: editing works best when the source material is already good.