Composition is the art of arranging the elements within your frame to create a compelling and impactful image. It’s the key to turning a simple snapshot into a work of art that tells a story, captures attention, and effectively conveys your message.
This comprehensive guide breaks down 26 essential composition rules to help you develop your photographic eye. You’ll learn the core principles, understand the tools you can use, and discover how to go beyond the basics to create truly unique photos.
TL;DR
- Composition is like a visual language you should learn to take and make better photos
- There are many composition rules to learn about and practice
- Each rule will work with a certain kind of subject and scene
- Learn the rules so you know when to use each one and when to break them for heavier impact
- The ultimate goal is to develop your “photographic eye”
Table of Contents:
- 1. The Rule of Thirds
- 2. Central Composition
- 3. Balance and Visual Weight
- 4. Symmetry
- 5. Leading Lines
- 6. Framing
- 7. Fill the Frame
- 8. Negative Space
- 9. The Use of Lines and Shapes
- 10. The Golden Ratio
- 11. Golden Triangles
- 12. The Rule of Odds
- 13. Focal Point
- 14. Breathing Room
- 15. Contrast and Similarity
- 16. Patterns and Textures
- 17. Simplicity (Minimalism)
- 18. Changing Your Perspective
- 19. The Role of Focal Length
- 20. The Straight Horizon
- 21. Composing with Depth of Field
- 22. Using Foreground Elements
- 23. Color in Composition
- 24. Aspect Ratio
- 25. Composing in the Edit
- 26. Learn to Break the Rules
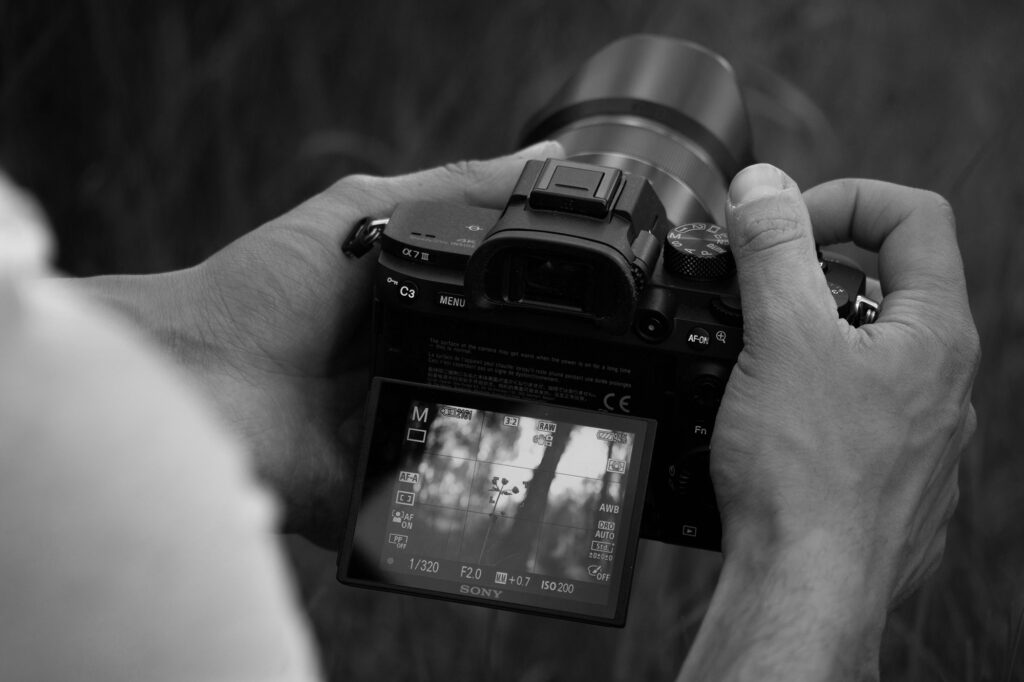
Before You Start: The examples you’ll see for these photography composition rules, are mostly practice shots. They’re not perfect, and they’re not supposed to be. (most of them are straight of camera jpgs. Some, from years ago.)
They’re just here to make the ideas seem a bit clearer and the possible results -when starting out- a bit more attainable. So you can go out there and do your own test shoots. I look forward to seeing the results of your experimentations, and your unique interpretations of each concept. (you can tag me on social media)
Part 1: The Core Principles of Visual Balance
1. The Rule of Thirds
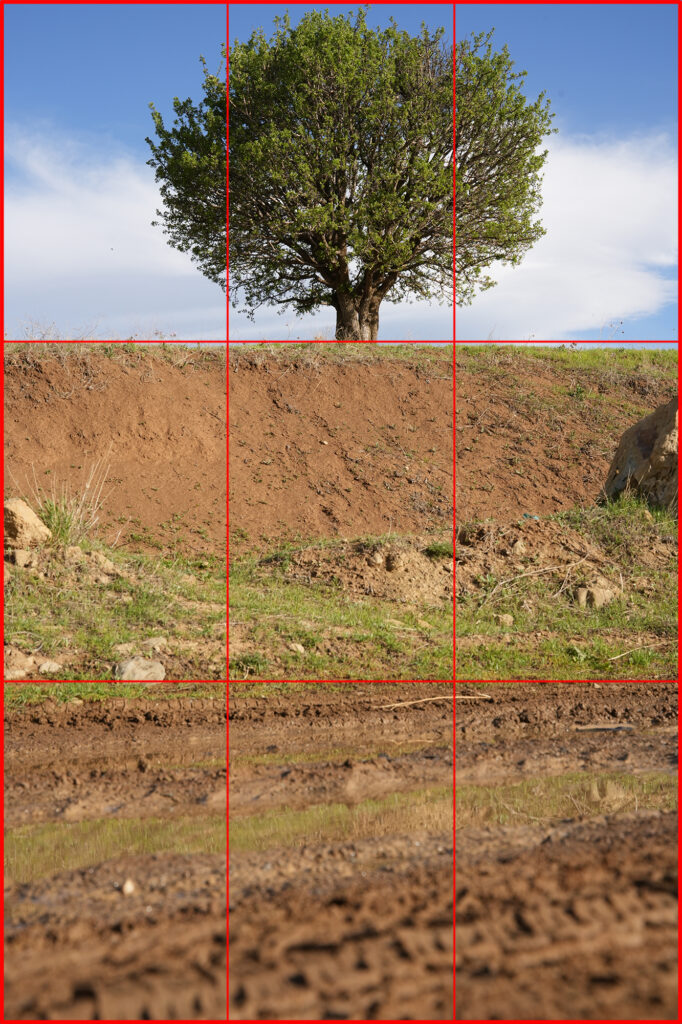
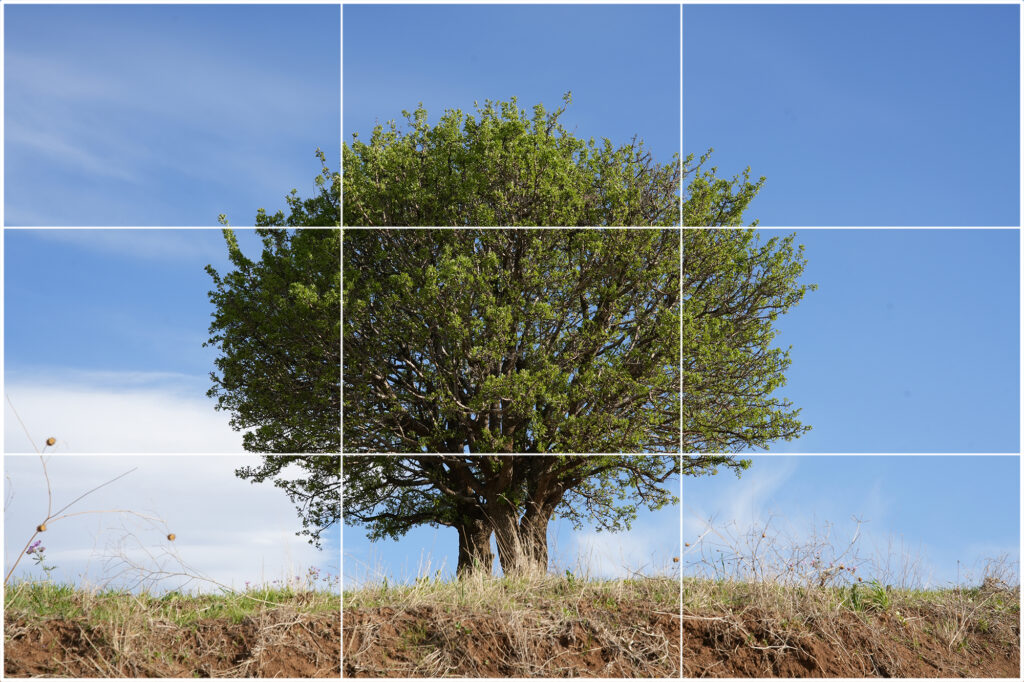
The Rule of Thirds is a foundational guideline that suggests you place your main subject or important elements along imaginary lines that divide each side of your frame into three equal sections.
So you’ll have two horizontal and two vertical lines inside a rectangle, forming a grid. And positioning your subject on one of these lines or at an intersection point usually creates a more dynamic and engaging image than a centered one.
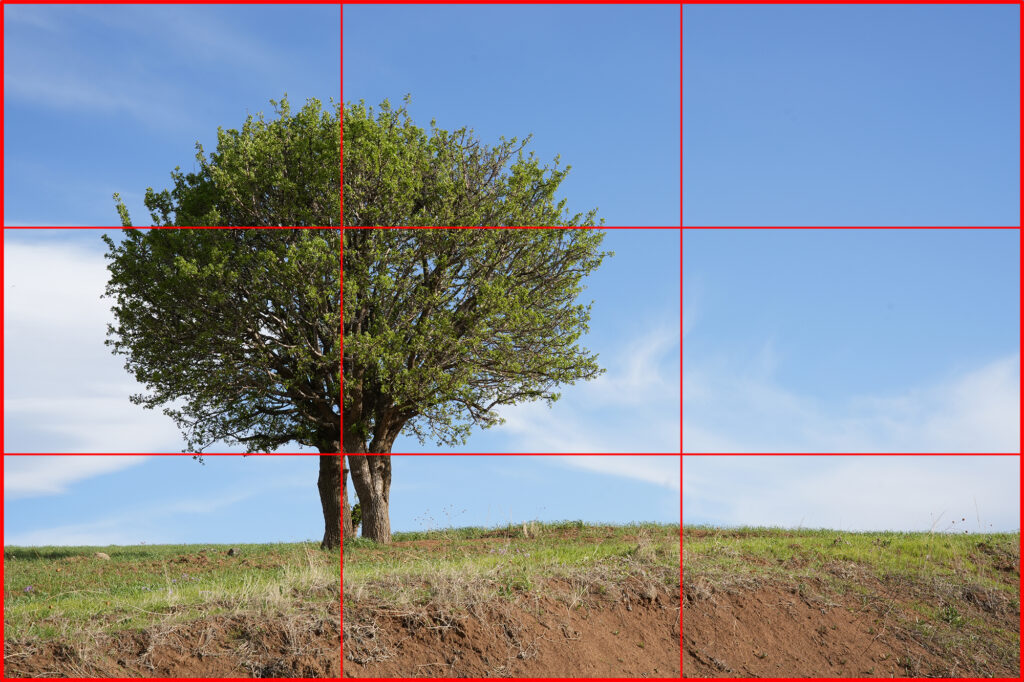
As you can see with a rule of thirds grid overlay below, the position of the horizon line and the main subject (the tree) follow this composition rule.
Rule in Action:
Placing a subject off-center forces the viewer’s eye to move across the frame, creating a more visually interesting journey. It avoids the static feel of a centered image, leading to a more natural and balanced composition.
How to Practice:
Turn on the Rule of Thirds grid on your camera or phone. For your next 10 photos, deliberately place your main subject on one of the lines or a point of intersection. Pay attention to how this simple change affects the feel of your images.
2. Central Composition
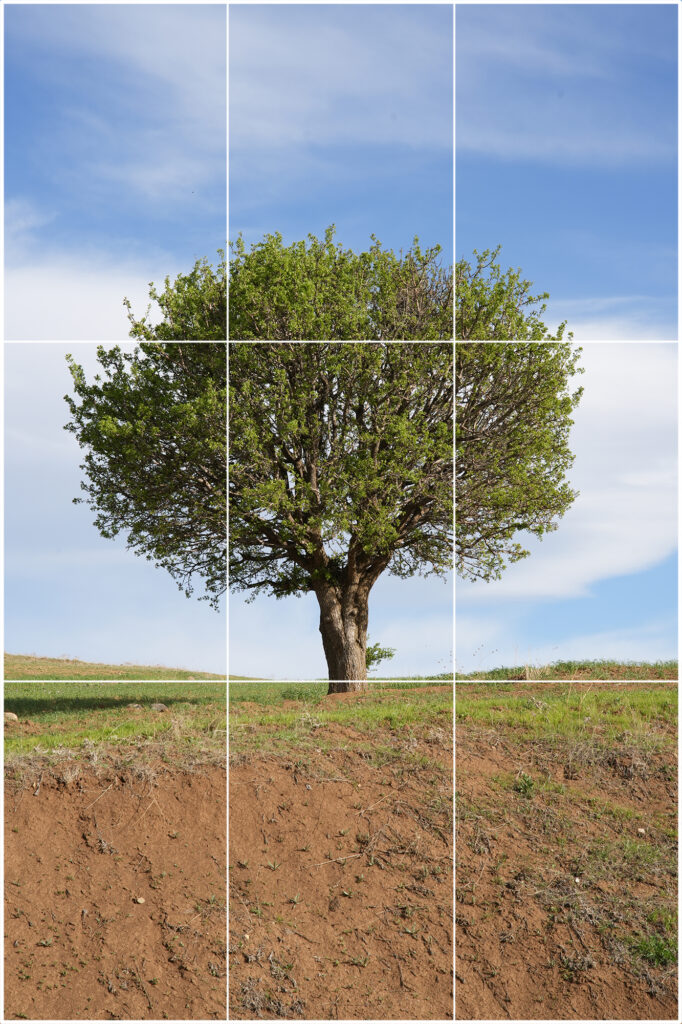
While the Rule of Thirds is often preferred, Central Composition places the subject directly in the middle of the frame. It’s especially effective when you want to emphasize symmetry, stability, or power. It’s a direct way to command attention and works well for minimalist shots or images of a naturally symmetrical subject.
You can use the rule of thirds grid to make a central composition too, as seen in the examples below.
Rule in Action:
A centered subject creates a sense of immediate focus and a feeling of harmony and order. It works by creating visual balance, which the human eye finds pleasing and calming.
How to Practice:
Choose any subject you want. Take one photo with the subject centered in the frame. Then, take another photo of the same subject using the Rule of Thirds. Compare the two images to see how the different compositions affect the viewer’s perception.
3. Balance and Visual Weight
Balance is about distributing the visual “weight” of objects in your frame. Understanding this concept is hard and usually takes a while for beginner photographers. Because there are no fast and easy rules -no weight formula- when it comes to balancing your composition.
You can balance an object on one side of your frame, by having another object on the other side, by negative space, or even by a bright color. And to make it even more confusing, bright can be balanced with dark, large with small, and living creature with inanimate object or just space. You can also create balance across horizontal, vertical, or diagonal line.
A balanced photo feels stable and complete, while an imbalanced one can feel jarring or incomplete.
In this example, the man’s silhouette has been balanced with a dark cloud.

Rule in Action:
The human brain naturally seeks equilibrium. A balanced composition feels harmonious because the visual weight is evenly distributed, even if the elements are not symmetrical. For example, a small, bright object can balance a much larger, darker object.
How to Practice:
Go out and take pictures of a scene, but before you press the shutter, ask yourself: “Does this photo feel balanced?” If not, try moving around to find a different perspective where the elements in the frame feel more harmonious.
4. Symmetry
Symmetry is a powerful tool for creating a sense of balance and stillness, often used with reflections. Note that symmetrical and central composition are not the same, and -although they complement each other nicely- you can have one without the other.
Asymmetry, on the other hand, can create a more dynamic image. You can have symmetry in the whole scene and create some asymmetry by placing your subject somewhere other than the middle.
Rule in Action:
Symmetrical images are naturally pleasing to the eye and convey order. Asymmetry creates a more dynamic composition, engaging the viewer’s eye by forcing it to move around the frame to find balance.
How to Practice:
Find a scene or subject with strong symmetry, such as a reflection in a puddle or a mirror, a building with great architecture, or a plant or animal with a simple background. Position your camera to capture a perfectly symmetrical image.
Part 2: Using Lines, Shapes, and Space
5. Leading Lines
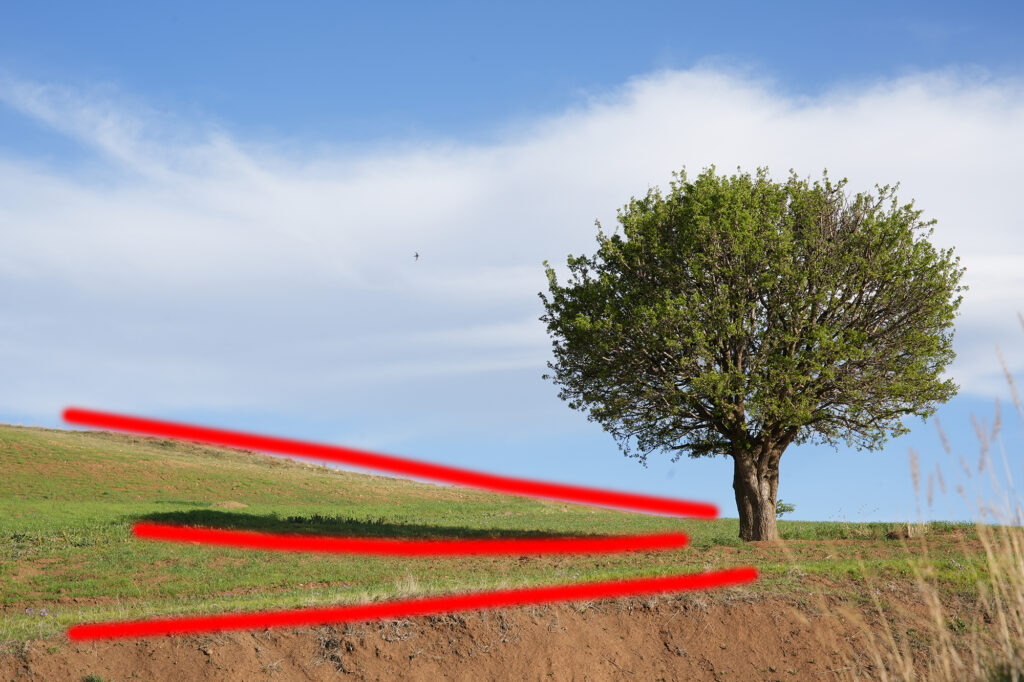
Leading lines are visual elements within your frame that guide the viewer’s eyes toward a specific subject or focal point. These lines can be straight or curved and can be created by roads, fences, walls, or even shadows.
Leading line don’t have be actual lines, they can be implied. And they are an excellent way to add depth and narrative to your photos.
You can see at least three lines, leading your eyes toward the subject (the tree) in the example below.
Rule in Action:
Leading lines work by exploiting the natural human tendency to follow a line or path. They create a sense of direction and movement, pulling the viewer’s gaze deeper into the image and directly to your subject.
How to Practice:
Look for a street, a railway track, a fence, or a path. Use these lines to guide the viewer’s eye to a person, an object, or a landmark in the distance. Take a series of photos where the lines start in the foreground and converge toward your subject.
6. Framing
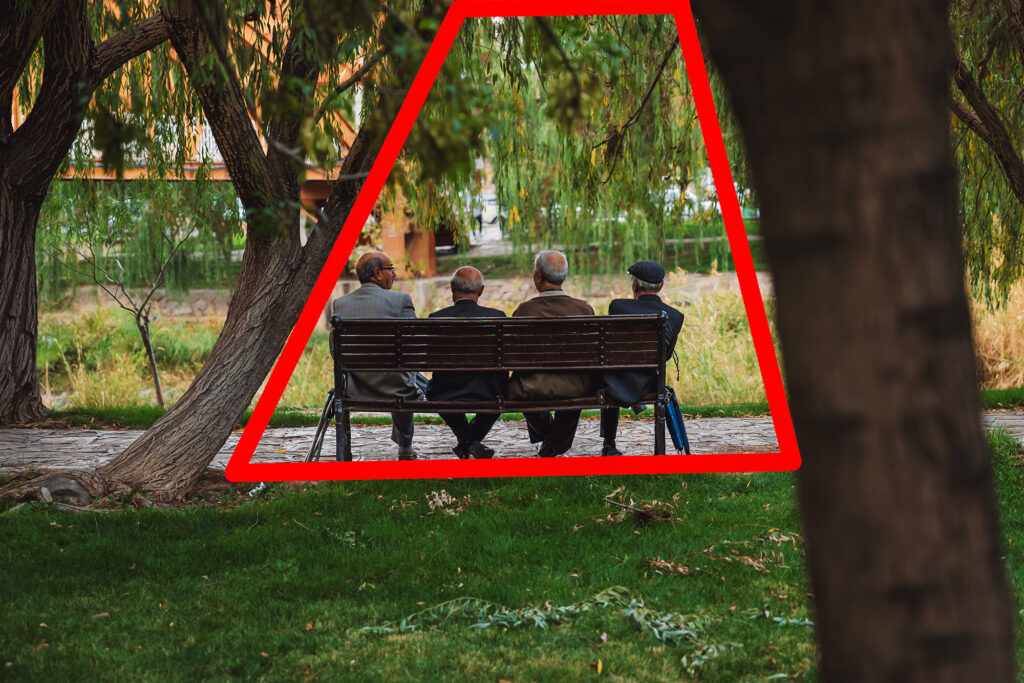
Framing is a technique where you use an object in the foreground to create a “frame within a frame.” This could be a window, a doorway, tree branches, or an archway. A frame draws the viewer’s eye directly to your subject, providing context and creating a sense of depth.
This is an example of using several lines to create a natural frame within a frame.
Rule in Action:
Framing adds context and depth by creating a secondary layer of visual interest. It isolates the subject and provides a clear point of focus, making the image feel more intentional and cohesive.
How to Practice:
Find a scene where you can use a natural or man-made element to frame your subject. Look through an open doorway, between two trees, or under a bridge. Take a photo that uses this element to create a secondary frame around your subject.
7. Fill the Frame
This rule means getting so close to your subject that it fills the entire frame. This is about eliminating distracting backgrounds and forcing the viewer to focus on the details of your subject. It’s a powerful way to create intimate, detailed, and impactful portraits or macro shots.
Rule in Action:
By removing all other elements, you ensure the viewer’s entire attention is on your subject. This creates a sense of intimacy and highlights textures, patterns, and details that would otherwise be lost.
How to Practice:
Pick a subject with interesting details, like a flower or a person’s face. Get as close as you can and take a portrait that fills the frame. Then, try to capture a scene where there are no empty spaces or irrelevant elements by carefully adjusting your perspective.
8. Negative Space
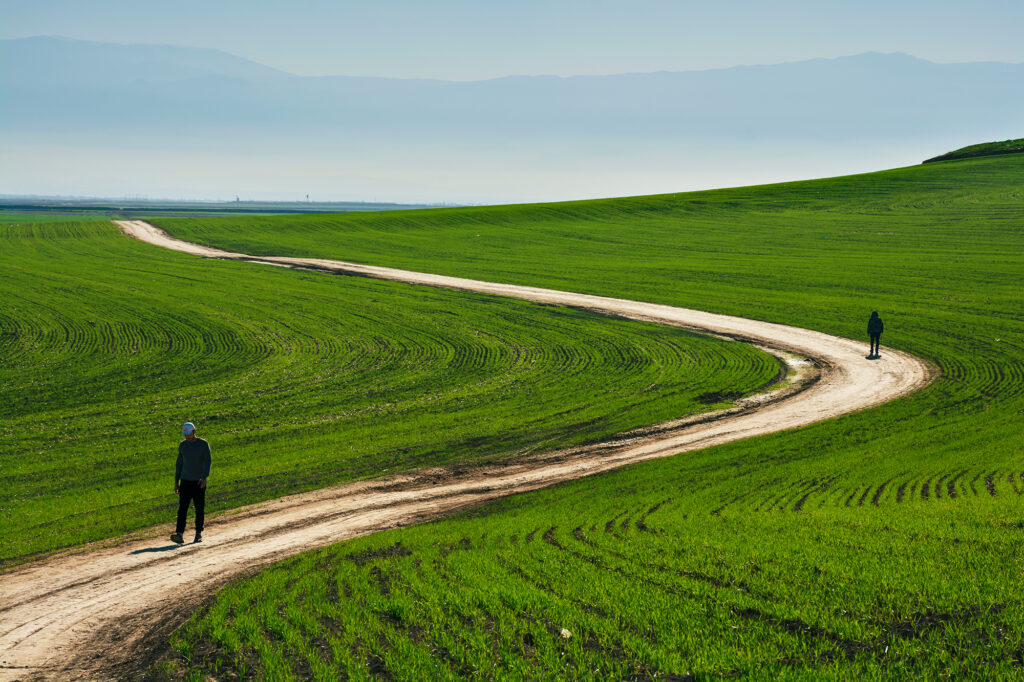
Negative space is the empty area surrounding your subject. It’s a powerful tool for creating a balanced image and drawing attention to your subject. Negative space is typically a uniform or simple area (like a clear sky, a wall, or a large body of water) that isn’t cluttered or distracting.
You can see an example of negative space being used to convey scale, below.

Rule in Action:
Negative space gives the subject “room to breathe” and prevents the image from feeling cluttered. It emphasizes the subject by creating a clean visual break, and it can also be used to convey a sense of scale, solitude, or peacefulness.
How to Practice:
Take a simple object and place it against a plain wall or a solid-colored background. Practice using a significant amount of negative space to make the subject stand out. You can also try this with a person in an open field or a boat on a calm lake to show scale.
9. The Use of Lines and Shapes
Lines are not only for guiding the eye; they can also convey emotion.
- Horizontal Lines: Communicate a sense of calm, peace, and stability.
- Vertical Lines: Represent strength, power, and height.
- Diagonal Lines: Convey a sense of tension, instability, or dynamic movement.
- Curved Lines: Suggest a sense of grace, softness, and flowing motion.
- Converging Lines: Create a sense of depth.
You can see some examples of different types of lines below.
Geometric shapes can also add meaning and structure to your compositions:
- Triangles: Can act as an arrow or convey energy.
- Circles: Draw attention to their center and can convey feelings of calmness.
- Squares and Rectangles: Add a sense of order and structure.
Rule in Action:
Our brains are wired to associate shapes and lines with emotions and ideas. By consciously using these elements, you can add a deeper layer of meaning to your composition without needing words.
How to Practice:
Take four different photos, each focusing on a different type of line. Find a calm landscape for a horizontal line, a tall building or tree for a vertical line, a winding road for a curved line, and a steep staircase or a jagged mountain for a diagonal line.
Look for shapes in everyday scenes, make them your primary focal point or subject. See what feelings each shape conveys.
10. The Golden Ratio
The Golden Ratio is an ancient concept used to create aesthetically pleasing compositions. It’s applied through the use of a Golden Spiral or Golden Rectangle grid. The idea is to place your main subject at the center of the spiral or along its curves and lines to draw the viewer’s eye inward.
Rule in Action:
The Golden Ratio is believed to be a fundamental principle of aesthetics found in nature and art. Composing with it can create an image that feels naturally balanced and harmonious, appealing to the subconscious mind.
How to Practice:
Use a Golden Ratio overlay (phi grid) in your photo editing software. Open some of your past photos and see where you could have applied this rule. Then, try to apply it to your next outdoor photoshoot.
11. Golden Triangles
The Golden Triangle grid divides your frame with a diagonal line from one corner to the opposite. You then draw two lines from the other two corners, creating three triangles. Placing your subject or other elements along these lines can create a compelling composition.
This example, shows the golden triangle rule in action.

Rule in Action:
This rule works similarly to the Rule of Thirds but provides a slightly different kind of dynamic balance. It is especially useful for images with strong diagonal elements.
How to Practice:
Like with the Golden Spiral, use a Golden Triangle overlay in your editing software. Open some of your past photos and look for ways you could have used this rule. Then, try to apply it to your next outdoor photoshoot.
Part 3: Advanced Techniques and Intentional Choices
12. The Rule of Odds
The Rule of Odds suggests that an image is more visually appealing when it contains an odd number of subjects. Odd numbers, such as three or five, create a sense of intrigue, as the viewer’s eye is forced to move around the image rather than resting on a single pair.
Rule in Action:
An odd number of subjects creates a dynamic composition by preventing the eye from pairing up the elements. This forces the viewer’s gaze to wander, exploring the entire scene.
How to Practice:
When photographing a group of people or objects, try to arrange them in odd numbers (e.g., three or five). This is especially useful for still life and product photography. Take a photo of three items and compare it to a photo of four to see how the balance and visual interest change.
13. Focal Point
Every photograph needs a focal point, which is the single most important element that immediately draws the viewer’s eyes. This is usually your subject. The focal point should stand out clearly from the rest of the image, and having one is essential for creating a captivating photo.
You can see in this example that how much of an impact can adding a focal point have; even if it seems tiny compared to the whole image. The small white car in the second image, works as a visual hook to get your attention.


Rule in Action:
The focal point gives the viewer a clear purpose for looking at the image. It answers the question, “What is this photo about?” without a clear focal point, an image can feel empty or boring.
How to Practice:
Look at some of your old photos. Can you easily identify the main subject or focal point in each one? If not, practice by taking photos where you deliberately make one element stand out by using light, color, or placement.
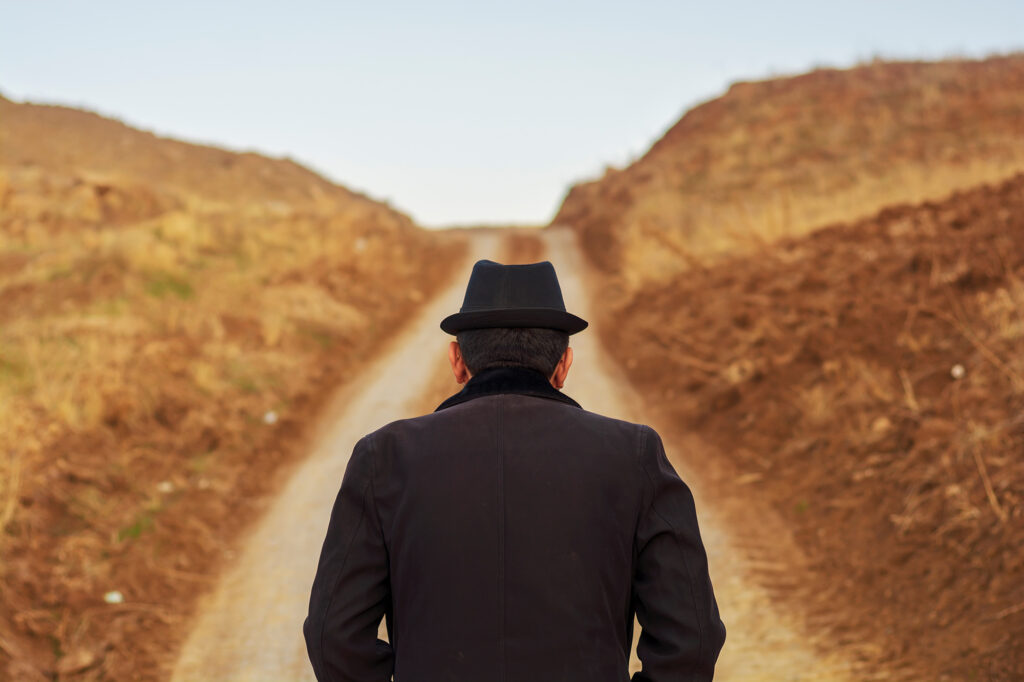
14. Breathing Room
The Breathing Room rule states that you should leave open space in the direction your subject is looking or moving. For example, if a person is looking to the right, place them on the left side of the frame to give them “breathing room.”
You can also do the opposite in an intentional way to create a feeling of unease or being trapped.
These examples show how the amount of breathing room affects the overall feel of an image.


Rule in Action:
This rule creates a sense of space and possibility within the frame. It allows the viewer to imagine what the subject is looking at or moving toward, adding a narrative element to the photo.
How to Practice:
Take a portrait of someone looking off-camera. First, place them so they have plenty of empty space in front of them (in the direction they are looking). Then, take another photo where you place them on the opposite side of the frame so they are looking into the edge of the photo. Compare the different feelings each image conveys.
15. Contrast and Similarity
Similarity occurs when you have two or more elements in your image that are alike in some way: shape, color, or texture. When correctly placed, this can create visual harmony. Contrast is the opposite, using opposing elements (e.g., old vs. new, light vs. dark) to create visual tension and make your subject stand out.
Rule in Action:
Similarity creates a feeling of visual rhythm and unity. Contrast, on the other hand, creates a point of interest by introducing something unexpected. It is a powerful way to draw the eye and highlight your subject.
How to Practice:
Find a scene with strong contrast, such as a black-and-white object on a colorful background or a single smooth stone among many rough ones. Take a photo that emphasizes this contrast. For similarity, find two objects with similar shapes or colors and compose a shot that highlights their connection.
16. Patterns and Textures
Patterns are repetitions of a certain shape or form, while textures are the visible surface qualities of an object. Both can be used to add visual interest to your images. You can use these elements to guide the viewer’s eye, or they can even become the main subject of your photograph.
In this example, pattern and texture have become the subject.

Rule in Action:
Patterns and textures add a sense of rhythm, depth, and tactility to your images. They work by creating a visual language that can either be the story itself or a powerful background that draws the eye.
How to Practice:
Go on a walk with the specific goal of finding patterns and textures. Look for a brick wall, a close-up of a leaf, a group of flowers, or the intricate design of a building. Take a few photos where the pattern or texture is the main subject and a few others where it acts as a background for your subject.
17. Simplicity (Minimalism)
This rule is a philosophy more than a technique: remove everything that doesn’t belong. A great photo is often one that removes all distractions and focuses on a single, clear subject. It’s about finding a simple, uncluttered background and a clean composition that tells a direct story.
As you can see, this relates to several other rules like fill the frame, negative space, and more.
Rule in Action:
The human eye is easily distracted. By removing all unnecessary elements from your frame, you ensure that your viewer’s attention is focused on the one thing that matters most. This principle makes your subject more powerful and your message more direct.
How to Practice:
Take a few of your existing photos and, in your editing software, try to crop out or remove any elements that don’t add to the image. This will help you train your eye to see and avoid distractions when you’re shooting in the future.
Part 4: Practical Tools and Workflow
18. Changing Your Perspective
Most people take photos from eye level, which often results in a boring or predictable image. Changing your perspective by getting low to the ground or shooting from a high angle can make your composition more unique and engaging, capturing a perspective that most people don’t see every day.
You can see the results of different perspectives, in theses examples.


Rule in Action:
A different perspective allows you to see the world in a new way. Shooting from a low angle can make your subject appear powerful and grand, while shooting from a high angle can make it look small or vulnerable.
When shooting animals, kids, or people with disabilities, you should try to put your camera at their eye level.
How to Practice:
For your next photography session, make a point of taking at least one photo from an unusual angle. Lie on the ground to photograph something at eye level with the dirt, or find a high spot to shoot down on your subject.
19. The Role of Focal Length
Your lens’s focal length also plays a significant role in your composition. Wide-angle lenses give you a wide field of view, making them great for capturing expansive landscapes. Telephoto lenses limit your field of view, making distant subjects appear closer.
If you want to learn more about focal length, you can read my lens terminology guide.
Rule in Action:
Your focal length is a powerful tool for visual storytelling. A wide-angle lens can make a subject feel isolated in a vast environment, while a telephoto lens can compress the background, making your subject feel closer to its surroundings.
How to Practice:
If you have a zoom lens, take two photos of the same scene. For the first, use a wide focal length to include a lot of the environment. For the second, zoom in to a telephoto focal length to compress the scene and make the background and subject feel closer together.
20. The Straight Horizon
A straight horizon is one of the most basic rules of composition, yet it is often overlooked. A crooked horizon can make a photograph look unprofessional and amateurish. Use your camera’s grid lines to ensure your horizon is perfectly level.
You can also do the opposite to convey anxiety or tension, also called using a dutch angle. But it has to be intentional to work, so think about it carefully.
You can see this composition rule in action, with these examples.


Rule in Action:
A straight horizon provides a sense of stability and order. A slightly crooked horizon can create a feeling of unease for the viewer, even if they don’t consciously know why.
How to Practice:
Make a conscious effort to check your horizon line every time you take a photo. If you’re on a scene with a visible horizon, use the grid on your camera to ensure it is perfectly straight. If there’s no horizon, or if you can’t level both your subject and the horizon at the same time, focus on keeping your vertical lines straight instead.
21. Composing with Depth of Field
Depth of Field is a key component of composition, especially in situations where the background is busy. A shallow depth of field (using a wide aperture) blurs the background, separating the subject from its surroundings. A deep depth of field (using a narrow aperture) keeps both the subject and the background in focus.
If you want to know more about aperture and depth of field and see some examples, see my exposure triangle guide.
Rule in Action:
A shallow depth of field works by removing visual clutter, drawing all the attention to your subject. A deep depth of field, conversely, works by telling a more complete story and providing context.
How to Practice:
For your next portrait or product shoot (especially outside of studio), use a wide aperture (e.g., f/1.8 or f/2.8) to blur the background and isolate your subject. Then, for a landscape or architectural photo, use a narrow aperture (e.g., f/11 or f/16) to ensure everything from the foreground to the background is in sharp focus.
22. Using Foreground Elements
A well-composed image often has three layers: a foreground, a middle ground (the subject), and a background. Using an element in the foreground can help create a layered image and add depth. It can also be used to obscure distracting areas and improve the overall composition.
You can see in this example that adding a few elements from the foreground have made the photo more interesting.

Rule in Action:
Foreground elements create a sense of depth and can make the viewer feel like they are inside the scene. They add context and help to create a visual path from the closest part of the image to the main subject.
How to Practice:
When you find a subject, look around for elements you can place in the foreground. Try taking a photo of a person through some tree leaves or of a building framed by a street sign. Experiment with different foreground elements to see how they add context and layers to your image.
23. Color in Composition
Color is one of the most powerful tools in your compositional toolbox. You can use it to guide the viewer’s eye, create a certain mood, add depth to a scene, or create balance in the whole image.
You can use a single, bold color to create a focal point, or use contrasting colors (like blue and orange) to create visual tension and energy.
To have natural colors in your photos, you should also learn about white balance in photography.
Rule in Action:
Color creates an immediate emotional and psychological response. For example, a warm color palette can evoke a feeling of comfort and nostalgia, while a cool palette can create a sense of calm or sadness. By being intentional with color, you can add a powerful layer of meaning to your work.
How to Practice:
Try a “color study” photoshoot. Pick a single, strong color and go out with the goal of finding subjects that are that color. You could also try a photo that features two contrasting colors.
24. Aspect Ratio
Your aspect ratio (horizontal vs. vertical vs. square) is an important compositional choice. Landscape photos often work best in a horizontal format, while portraits of tall subjects like people or buildings can benefit from a vertical frame. The square format is great for creating simple, minimalist compositions.
Rule in Action:
Aspect ratio is a fundamental compositional choice that changes the entire feel of a photo. A wide, horizontal shot can feel cinematic and expansive, while a vertical shot can feel more intimate and focused.
How to Practice:
When you have a subject in mind, take three versions of the same photo: one horizontal, one vertical, and one with a square crop. This will help you see how aspect ratio can completely change the composition and feel of an image.
Part 5: Bringing It All together
25. Composing in the Edit
Composition is not just about what you do in the camera. You can also refine your composition during the editing process. Tools like the crop tool are invaluable for straightening horizons, removing distracting elements, and repositioning your subject within the frame.
Rule in Action:
Editing allows you to salvage an otherwise flawed photo by improving its composition. You can fix mistakes, create a more powerful narrative, and guide the viewer’s eye more effectively than you could in the moment.
How to Practice:
Go back to some of your past photos and look at them with a compositional eye. Use the crop tool to try out different crops. Can you make a better image by removing distractions or straightening the horizon? This is a great way to learn composition without taking a new photo.
26. Learn to Break the Rules
The final and most important rule is to remember that these are just guidelines. Every rule we’ve discussed can be intentionally broken to create a unique and powerful image. The purpose of learning these rules is to develop your visual literacy and build the confidence to make creative decisions.
Rule in Action:
Breaking a rule is a powerful way to make a statement. For example, a deliberately crooked horizon can convey a feeling of unease or tension, while a centered subject in a busy frame can create a sense of overwhelming chaos.
How to Practice:
Once you’ve practiced the rules, try a “rebellion” project. Deliberately break a rule you’ve just learned. This will help you understand the power behind these rules by seeing the effect of breaking them.
Last Words
Composition is the backbone of photography. While gear and settings matter, it’s composition that makes an image memorable and impactful. By learning these rules and practicing them intentionally, you’ll develop an instinct for framing scenes that resonate with viewers.
But remember, these rules are guides, not unbreakable laws. The more you practice, the more natural they’ll become, and eventually you’ll know when to use them, and when to bend or break them for stronger impact.
Good composition is less about rigid rules and more about making deliberate choices that enhance your subject and story. Regularly study photos you admire and analyze which compositional rules are at play, continually challenge yourself with small assignments, and review and reframe your older photos in editing to test things out.
You’ll get your own unique “photographic eye” in no time.
Want to keep learning? Follow me on your favorite social media (handle everywhere: @MediabyHamed / search for Hamed Media) or subscribe to my newsletter for more practical tips and guides like this.
FAQ
Why is composition important in photography?
Composition controls how a photo feels and what story it tells. A strong composition keeps the viewer’s attention on the subject and makes the image more memorable.
What are the basic rules of composition in photography?
The basic rules include the rule of thirds, leading lines, framing, negative space, symmetry, and many more. These techniques help guide the viewer’s eye and make images more visually appealing.
Can I break the rules of composition?
Yes, once you understand the rules, breaking them with intention can lead to powerful, creative images. The key is knowing why you’re breaking a rule and what effect it creates.