When creators talk about video quality, the first thing they mention is the camera. Resolution, frame rates, dynamic range: visuals get all the attention. But here’s the truth: audiences will forgive shaky footage before they forgive bad sound. Crisp audio is what makes your work feel professional, while muffled voices, background hum, or inconsistent levels immediately signal “amateur”.
The good news? You don’t need a studio or expensive gear to dramatically improve your audio. With a few simple techniques, you can make your videos sound clean, balanced, and engaging, giving your visuals the impact they deserve. So let’s dig in and see why audio matters for your videos, and how you can improve yours now.
TL;DR
- Audio > visuals: viewers leave faster because of poor sound than poor picture.
- Avoid rookie mistakes: built-in mics, background noise, and no monitoring.
- Quick wins: use an external mic, record in a quiet place, and wear headphones.
- Light editing fixes: clean noise, balance dialogue, and boost clarity with EQ.
- First upgrades: a budget mic and free editing tools go a long way.
Why Audio Matters More Than You Think
When we consume video content, we often believe visuals carry the story. But in reality, it’s audio that does most of the heavy lifting. Dialogue tells the narrative, sound effects make moments feel real, and music sets the mood. Without good sound, even the most cinematic footage falls flat.
- Audio drives emotion: A moving score or subtle ambient sounds can make a scene feel powerful, tense, or calm.
- Poor sound ruins credibility: Background hiss, muffled voices, or inconsistent volume distracts viewers and makes your video feel unpolished.
- Sound shapes perception: Even average footage can feel “professional” with clean, well-mixed audio.
If your video looks amazing but sounds bad, people will stop watching. If your video looks average but sounds great, they’ll often stick around. That’s why audio isn’t just important, it’s critical.
Common Audio Mistakes Beginners Make
When you’re just starting out, it’s easy to underestimate how fragile good sound can be. Here are the pitfalls most creators run into:
- Relying on the camera’s built-in mic: On-board microphones are too far from the subject, pick up room noise, and often sound thin or echoey.
- Ignoring background noise: Fans, traffic, buzzing lights, or even clothing rustle can sneak into recordings and are hard to fix in post.
- Inconsistent audio levels: Switching between clips with very different volumes creates a jarring experience for viewers.
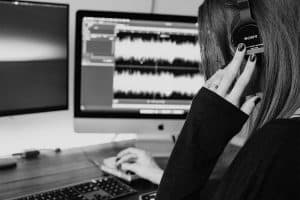
- Not monitoring during recording: Skipping headphones means you won’t catch problems like clipping, hum, or distortion until it’s too late.
- Forgetting room acoustics: A bare room with hard walls creates echoes and reverb that editing software can’t always save.
- Over-processing in post: Overusing noise reduction or EQ can make voices sound unnatural and metallic.
By avoiding these mistakes, you’ll already be ahead of most beginners and can set yourself up for cleaner, more professional audio.
Don’t know which type of microphone you should use? read this guide on how to choose the right microphone for video.
Quick Fixes: How to Get Better Audio Right Away
You don’t need a studio setup to noticeably improve your sound. A few simple adjustments can make a huge difference:
- Get closer to the mic: Distance is the biggest factor in audio quality. Position the mic as close as possible to your subject without entering the frame.
- Use soft furnishings: Curtains, rugs, or even hanging blankets reduce echo and reverb in untreated rooms.
- Turn off noisy devices: Switch off fans, AC units, and buzzing lights before recording.
- Angle away from noise sources: Point your microphone away from windows or open doors where sound may leak in.
- Record a test clip: Capture a few seconds, listen with headphones, and adjust levels before rolling for real.
- Enable manual audio levels: If your camera or recorder allows it, set levels manually to avoid sudden volume changes caused by auto gain.
These quick fixes can instantly lift your audio from “distracting” to “clean enough”, giving your video a much more polished feel without expensive gear.
Light Touch in Post: Editing Basics You Can Do Immediately
Even if your raw audio isn’t perfect, simple editing steps can make it far more pleasant to listen to:
- Trim unwanted noise: Cut out gaps at the beginning and end of your clips where background hum or chatter sneaks in.
- Normalize levels: Bring the overall volume to a consistent standard so viewers don’t have to adjust their speakers constantly.
- Use noise reduction carefully: Most editing software offers a noise reduction tool. Apply it lightly to reduce hiss or hum without making voices sound robotic.
- EQ for clarity: A gentle high-end boost (around 3–6 kHz) makes voices crisper, while cutting low rumble (below 80 Hz) removes unnecessary background noise.
- Add light compression: Compression evens out loud and soft parts so dialogue stays intelligible, but avoid overdoing it or voices may sound flat.
These basic edits take only a few minutes but can transform rough recordings into professional-sounding audio. Think of it as the audio equivalent of color correcting your footage: subtle tweaks that elevate the whole production.
Start your journey by reading this guide on basics of audio editing for video.
Essential First Gear Upgrades
If you’ve mastered the basics and want your audio to consistently sound professional, a few affordable gear upgrades will make the biggest difference:
- External Microphone:
The built-in mic on your camera or phone picks up everything, including room noise. Using a shotgun mic or a lavalier (clip-on) mic immediately improves clarity and focus. - Wind Protection:
A foam cover or furry “deadcat” prevents wind rumble when recording outdoors. This upgrade is inexpensive but dramatically improves outdoor audio. Pop filter will have a similar function for indoor recording. - Headphones for Monitoring:
Always monitor while recording. Closed-back headphones let you hear problems like buzzing, clipping, or background chatter before it ruins a take. - Basic Audio Interface / Recorder:
For creators stepping up from a DSLR or smartphone, a portable recorder (like Zoom or Tascam) or a simple USB audio interface ensures cleaner sound and more control over levels. - Mic Stands or Mounts:
Keeping the mic steady and close to your subject prevents handling noise and improves voice clarity more than most filters or post-fixes.
Start with one or two upgrades that fit your workflow and budget. Even a single external mic can change your video’s audio quality overnight.
Long-Term Strategies for Better Sound
Quick fixes and a good mic can take you far, but to consistently achieve professional-quality audio, you’ll want to think about long-term practices:
- Room Treatment
Hard walls create echo and reverb that microphones capture. Adding soft furnishings, rugs, curtains, or even acoustic panels makes your recordings sound tighter and more controlled. - Consistent Recording Environment
Whenever possible, record in the same quiet space. Familiar conditions help you control variables and avoid surprises. - Level Discipline
Learn to set proper gain before recording. Avoid recording too low (which increases hiss when boosted later) or too high (which clips and distorts). - Backup Audio
Recording a safety track at a lower gain, or even on a second device, ensures you won’t lose a great take to unexpected noise or peaking. - Developing an Ear
Spend time listening critically to films, YouTube creators, and podcasts. Notice how their audio sounds balanced, clear, and intentional. Training your ear helps you spot problems faster in your own recordings. - Invest Gradually
Instead of chasing expensive gear right away, build a solid foundation: good mic technique, basic editing skills, and controlled environments. Later, upgrade preamps, better mics, or advanced processing tools when your projects demand them.
These habits turn audio from an afterthought into a consistent strength of your video work.
If you want to keep learning about audio, I would recommend this guide next: 10 Tips to Get Better Sound for Your Video Projects.
Last Words
Good audio is not a luxury, it’s a necessity. Viewers will forgive imperfect visuals, but poor sound will drive them away instantly. By paying attention to your recording environment, making small adjustments in post, and gradually investing in the right gear, you can elevate your videos dramatically. Start simple, focus on clarity, and let your audio support the story you’re trying to tell.
Want to keep learning? Follow me on your favorite social media (handle everywhere: @MediabyHamed / search for Hamed Media) or subscribe to my newsletter for more practical tips and guides like this.
FAQ
Why does bad audio feel worse than bad video?
Because our brains work harder to process unclear sound. Fatigue sets in quickly, and most viewers click away within seconds.
Can I fix all bad audio in editing?
Not really. You can reduce noise or adjust levels, but distorted or muffled recordings rarely become professional-sounding. Getting it right at the source is key.
Do I need expensive gear to sound good?
No. A decent microphone, quiet space, and basic editing practices can get you 80% of the way there. Upgrades only matter after you master the basics.